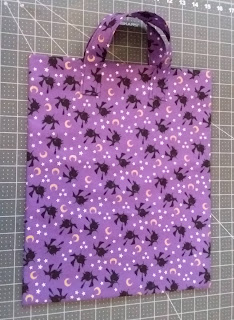
Kiki needed a matching bag for her costume so I made this simple trick-or-treat bag. It is fully lined with handles and just the right size for trick or treating. It's super easy to make and very inexpensive.
Here is what you need to make the bag:
1/2 yard fabric for outside of bag and handles
1/2 yard fabric for lining
matching thread
Difficulty: Easy
Cost: $
First, cut out your pieces.
For the outside cut a 17 1/2" x 26" rectangle
For the lining cut a 14" x 26" rectangle
For the handles cut (2) 14" x 3 1/2" rectangles
These are the pieces:
Sew around the edge, leaving an opening on the side for turning.
Clip the corners.
Turn the straps right side out. Tuck in the seam allowance at the opening and press the straps flat. Top stitch along the long sides, about 1/8" from the edge.
Now we'll make the bag. Pin the lining to the outside of the bag, right sides together, along the 26" side and stitch.
Press it flat.
Press the seam allowance toward the lining.
Stitch on the lining, close to the edge. Make sure you stitch the seam allowance down as you sew.
Fold the bag in half the long way. Make sure you match the seam. Pin well. Stitch around the whole perimeter, leaving an opening at the bottom of the lining to turn it right side out.
Tuck in the seam allowance at the opening and pin it shut. Stitch across the opening.
Stuff the lining into the outside of the bag, pushing the corners of the lining into corners of the bottom of the bag. The lining is slightly shorter than the outside of the bag. This creates a little rim around the top of the bag.
Press the bag flat.
Measure in 3 1/4" from the side and 2 1/4" from the top of the bag to position the straps. Pin well.
Stitch a small square on the bottom of the strap to attach it to the bag. Make sure you back stitch so it's really secure.
And you're done!


No comments:
Post a Comment