
You know I love vintage Singer sewing things. Here is a super fun project from one of my favorite little booklets that Singer put out. It is from "How to Make Aprons," from 1962.

Here are the original instructions and pattern from the booklet:
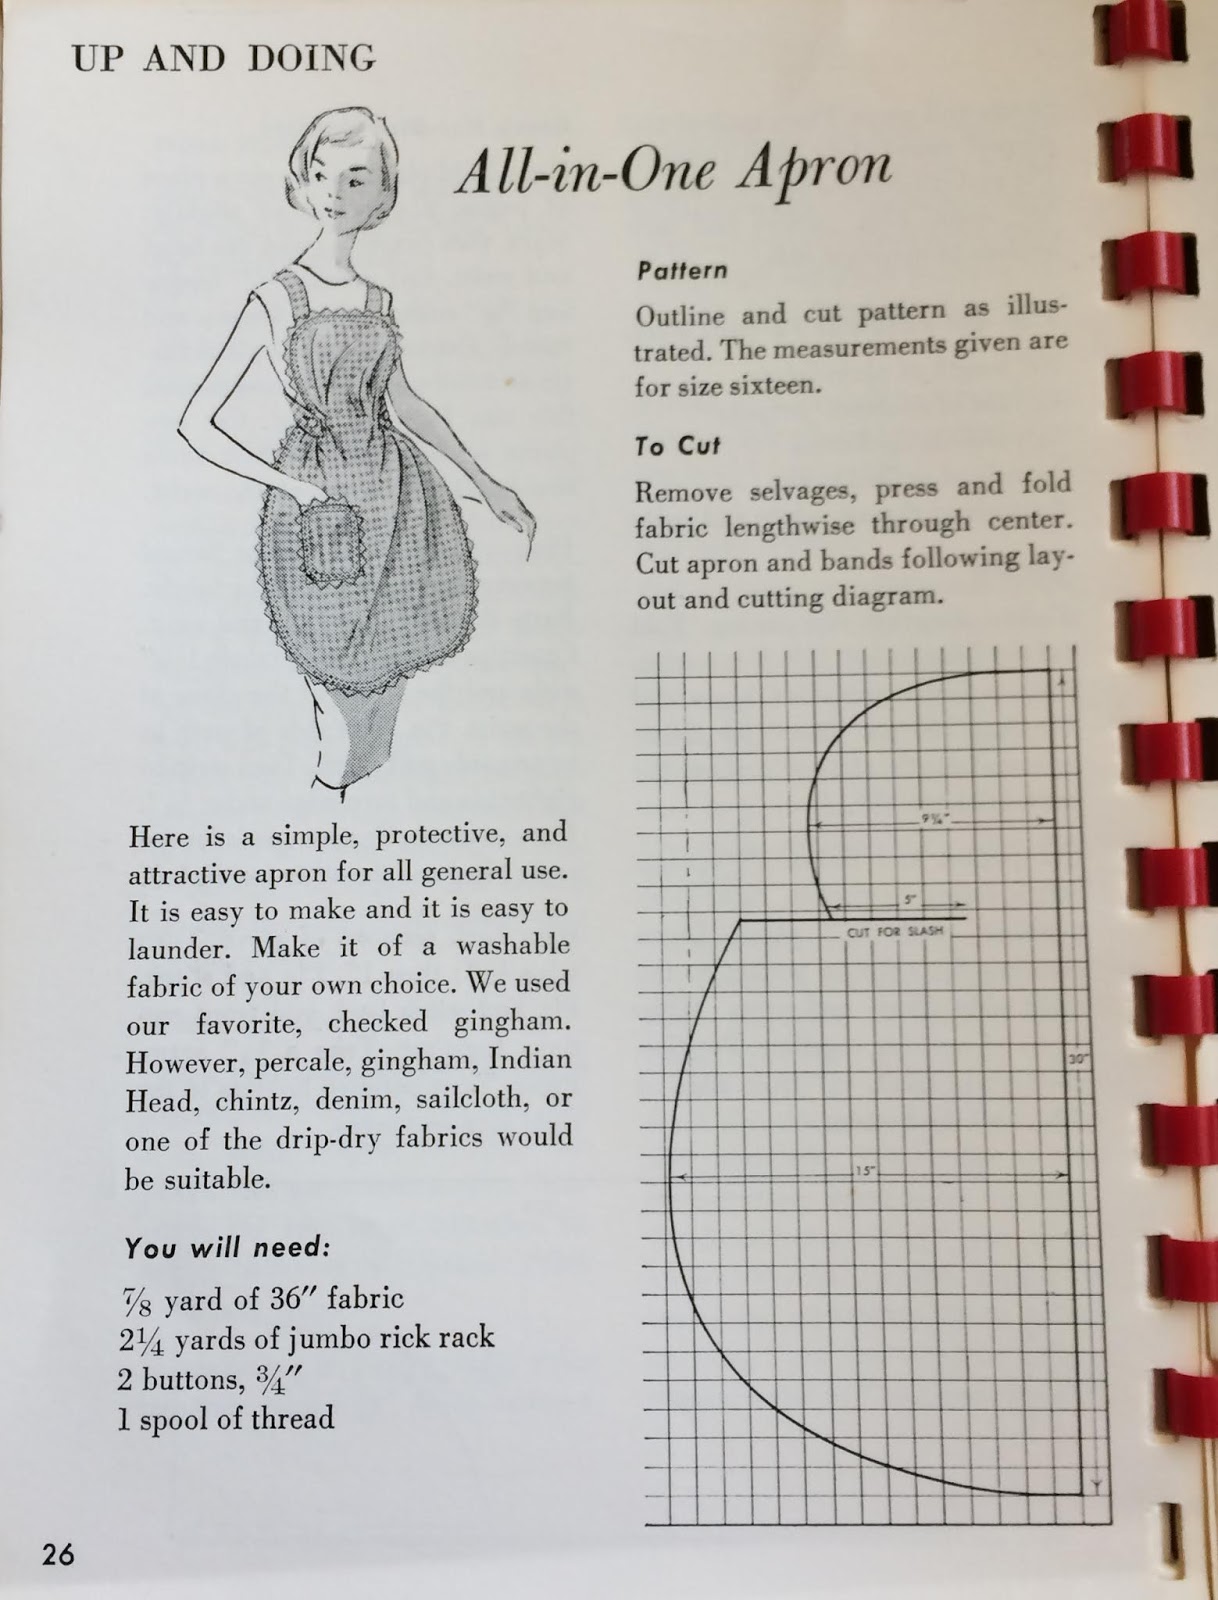


If you want to make it as they have it, for an adult, you can. Or I have adjusted the pattern to make it toddler sized. Here it is:

Isn't it cute? And the best part? You can make it from a fat quarter of fabric!
Here is how to make your own toddler sized Retro All-In-One Apron:
Difficulty: ❥❥
Cost: ❥ (less than $5)
Supplies:
❥1 fat quarter of fabric (or you can make 2 from 1/2 yard)
❥1 1/3 yard of 1/2 inch wide rick rack
❥1/3 yard mini rick rack (or 2/3 yard if you would like 2 pockets)
❥2 buttons (1/2 inch)
❥Thread
Some of their instructions were a little unclear to me so I have changed things a little bit. Also I adjusted the layout so it would fit on a fat quarter so don't use the layout from the booklet, use the layout on the pattern.
Here is the pattern.
Let's get started.
-First print the pattern, cut on the dotted lines, and connect the heart shapes to make one large pattern piece.
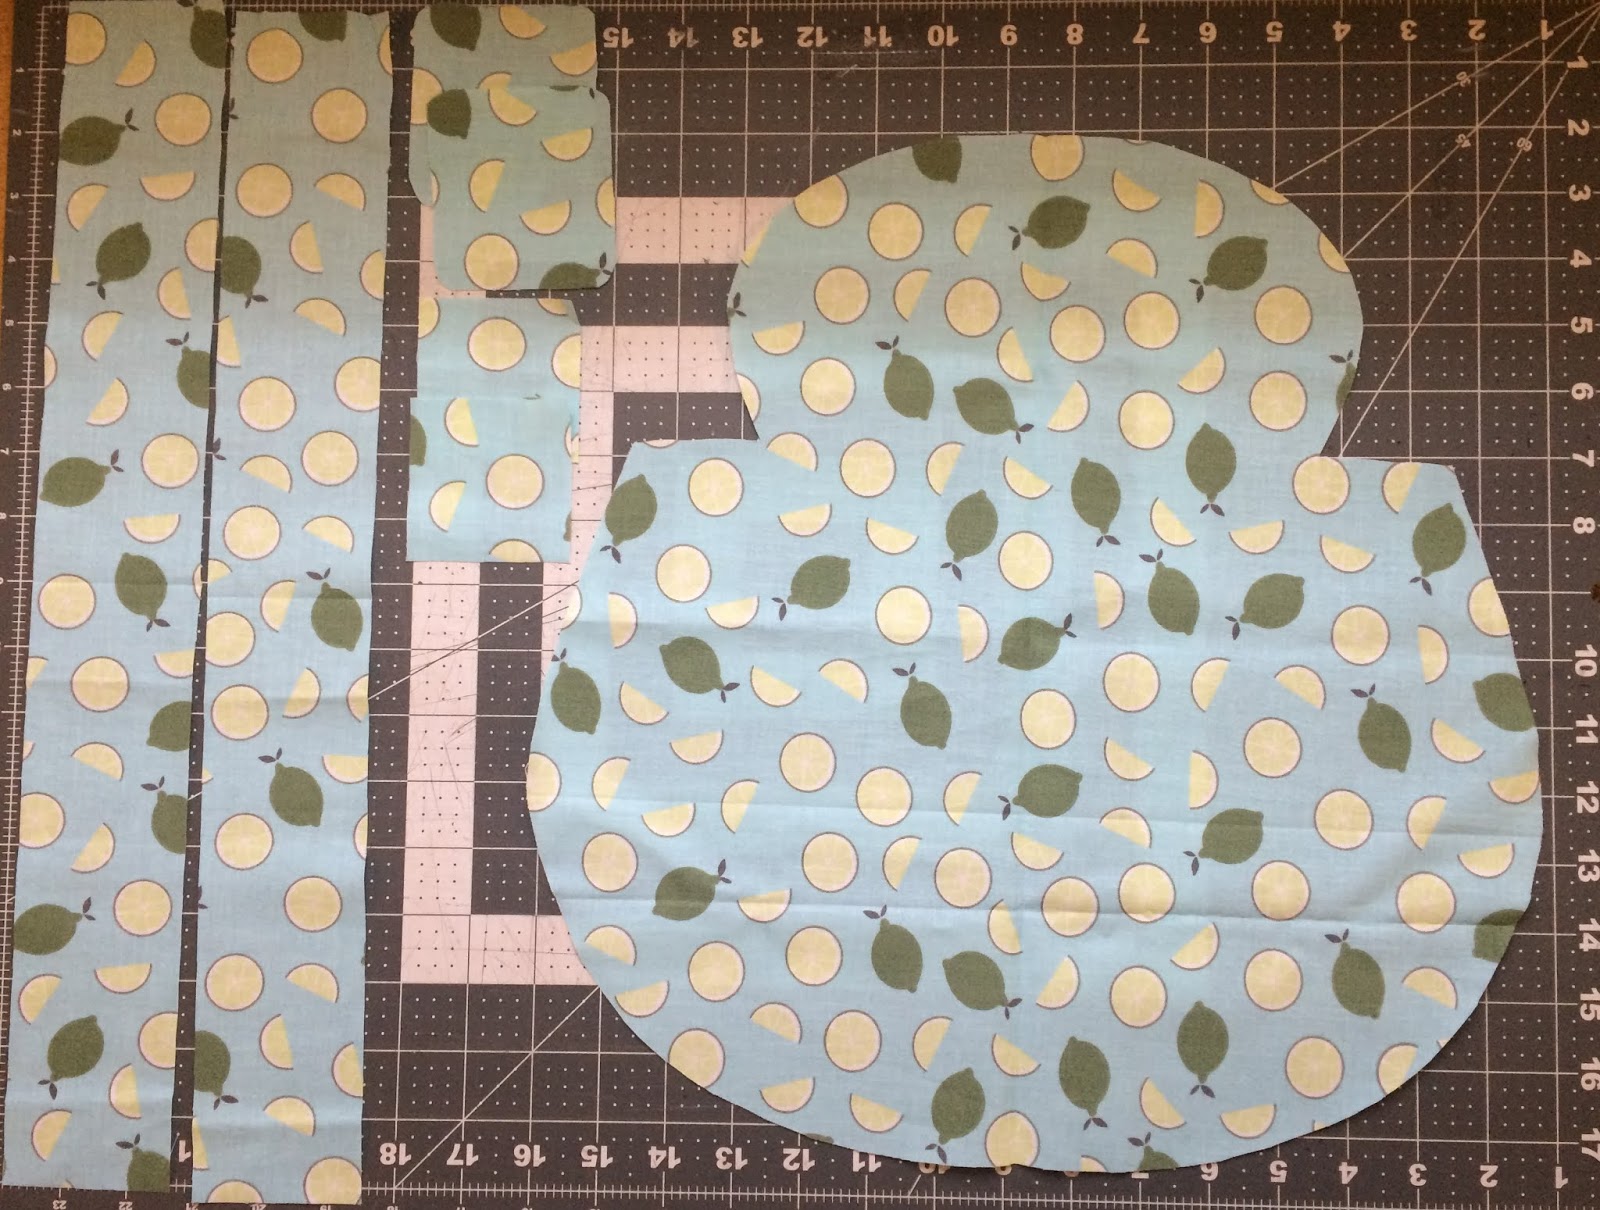
-Fold your fat quarter of fabric and lay the pattern on it with the fold where marked on the pattern. Pin well in each of the pieces you will cut out. Cut through the paper and fabric at the same time.
You should end up with the following pieces:
-Apron body
-2 bands (2.5" by 18")
-2 extension bands if needed for piecing (2.5" by 2.5")
-2 pockets (2.75" by 3" with curved corners)
-Now, cut the slash in the apron that will be the gathered sides of the waistline.
Here are the instructions, changed with the correct measurements for the toddler's apron:
-Cut between bib and skirt from one side toward fold as indicated on pattern. Gather both edges of slash. Machine-base, 1/8" from edge, from point of slash to 1/2" from edge. Draw under threads gathering the two edges to 1 3/4". Tie threads at each end. Pin together gathered edges, right sides together, and baste. Stitch ,starting at the edge with a 1/4" seam and taper to a point 1/2" beyond end of slash. Press seam and overcast edges. Here is the diagram from the booklet:


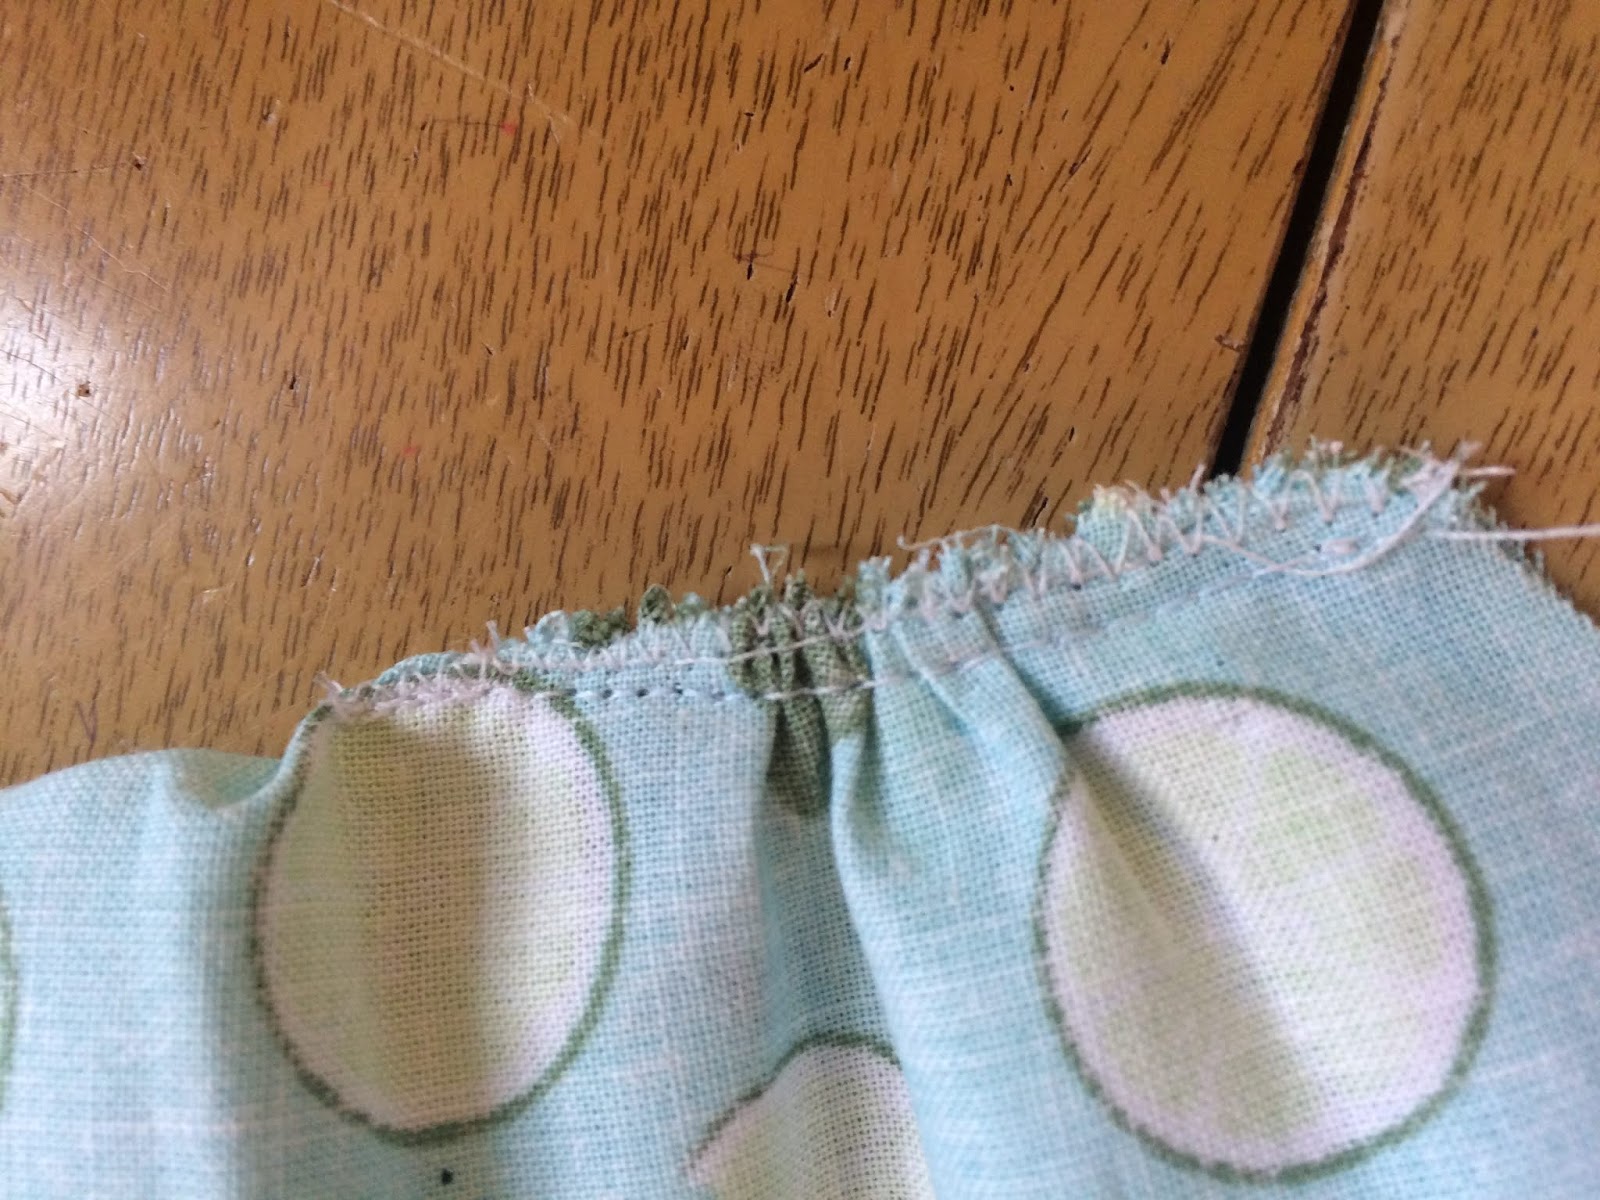
-Repeat with the other slash. It should look like this:

-Now apply the rick rack. This will be a cute edge and makes it really easy to hem around the whole thing. It's great for curves. Start at one of the slashes and put the rickrack on the right side of the fabric, matching up the edges. Using a 1/4" seam allowance, stitch around the whole apron and overlap the end of the rick rack just slightly.


-Press the apron, folding the rick rack back, so the points stick out from behind.


-Then do a second line of top stitching, this time matching the outside of the right toe of the foot to the fabric. This puts your second line about 3/32" away from the first. It will look like this:

Now the pocket(s):
-Stitch the mini rick rack, face down on the right side of the fabric, all the way around the pocket.

-Turn and press. Then top stitch the top edge of the pocket starting before the curve and ending after the other curve, then do a second line of stitching as you did on the skirt of the apron.

-Repeat pocket steps if you would like a second pocket. I just did one pocket but two would be adorable.
-Place the pocket(s) on the apron where desired and pin well.

-Top stitch the pocket sides and bottom onto the apron, matching your stitches to where they ended on the top of the pocket. Then do a second line of stitching as before Be sure to back stitch well so the pocket is on securely.

Now to make the bands:
-Add a 2.5" square extension piece to the end of each of your bands, then press the seam open.

-Fold one of the bands the long way, right sides together, and sew along the side, backstitching at each end. Repeat for the second band.
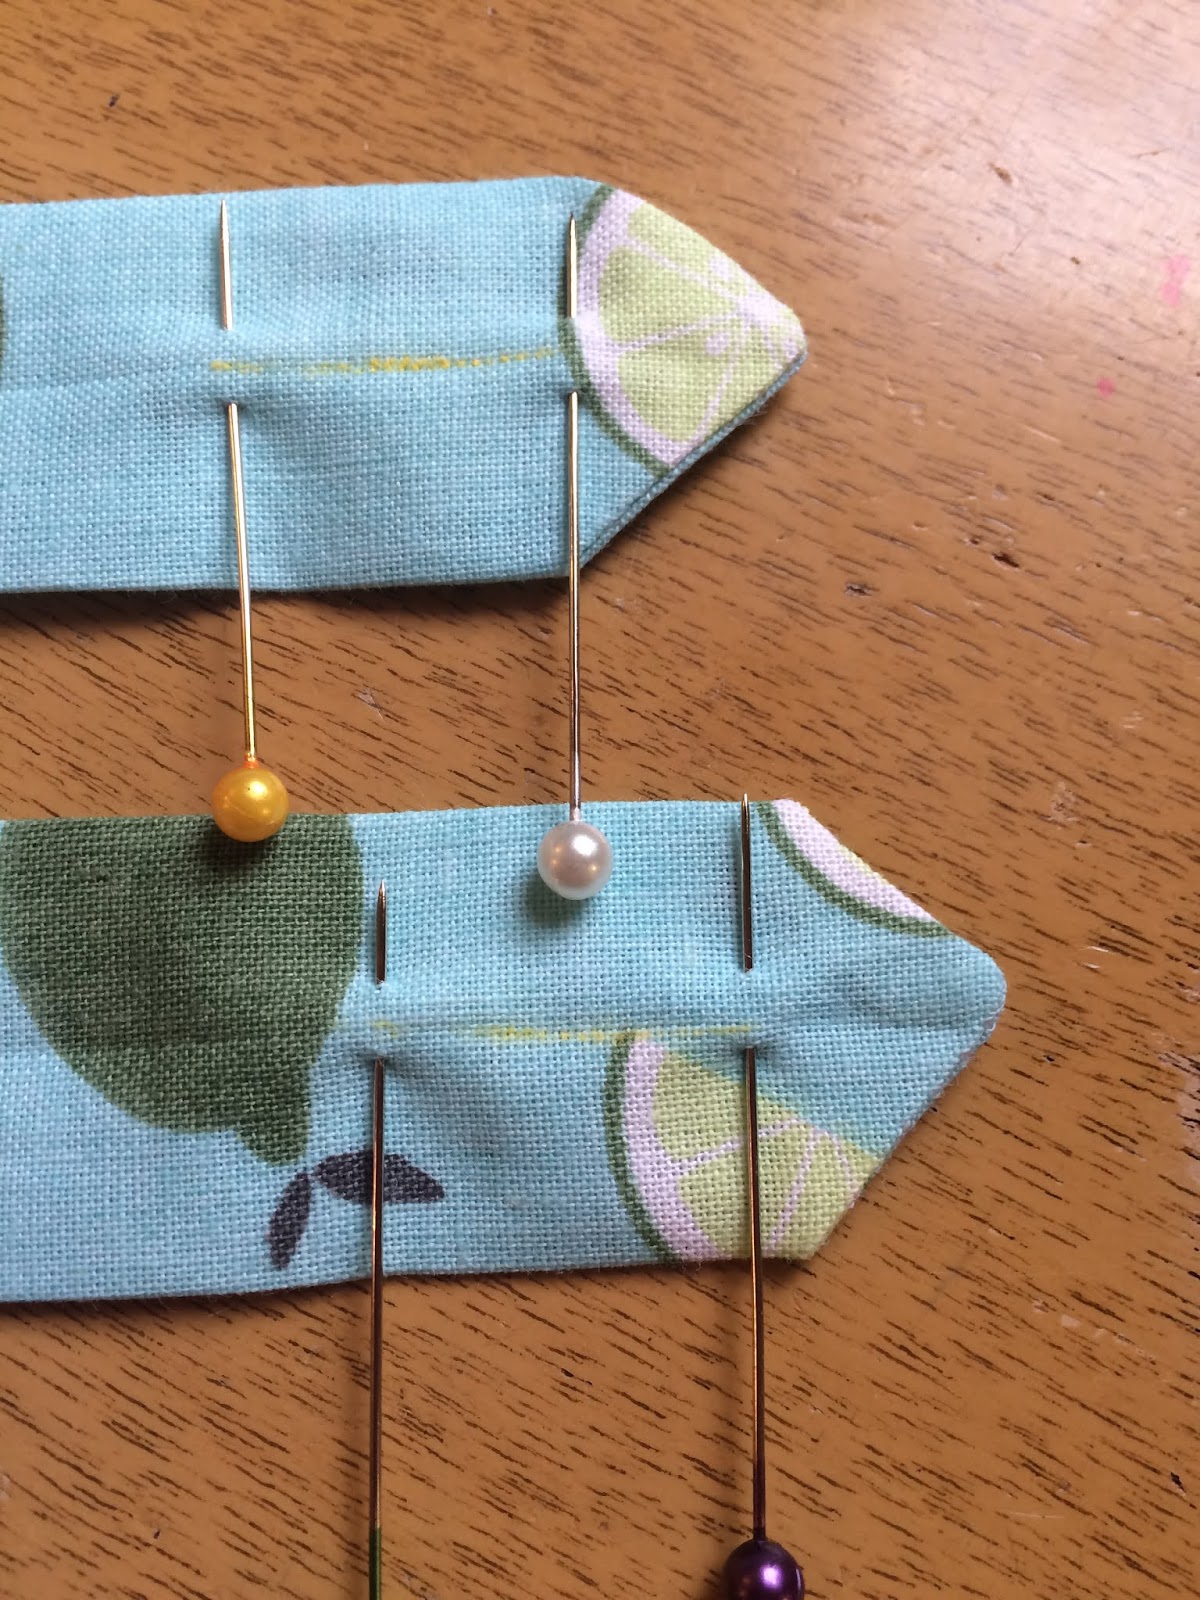
-Make a point in the end of each of the bands. Just mark the stitch line with chalk or a pencil or chalk.

-Stitch on the lines you drew, then clip the corners and trim the seams.

-Turn the bands right side out. I use the eraser end of a pencil to force it right side out.

-Press the bands well.

-Mark where you will make your buttonholes at the end of each of your bands, starting 1/2" from the end and make the buttonhole 3/4" long.
-Make the buttonholes.

(At this point you may want to test fit your apron to make sure the straps are the right length for your toddler. The straps cross in the back. For my apron I made the straps 19 inches long when finished, from the end to the point).
-Find the center of the top of the bib. Mark it with a pin. Place your straps 1 3/4" from the center of the bib to the inside of the strap. Pin the straps on the back of the bib.


-Now you will top stitch the bib and attach the straps at the same time. Starting at the slash, top stitch around the bib to the other slash, making sure you stitch over the ends of the straps as you go. Then do a second line of stitching along your first line of top stitching as you did on the skirt, meeting the ends of the topstitching around the skirt of the apron.
-Sew your buttons onto the ends of the slash. I used 2-hole buttons and had the holes horizontal on the apron. I used my button sewing foot but you could sew them on by hand if you want.

That's it! Your Retro All-In-One Toddler Apron is done!

I hope you have as much fun with it as I did!
No comments:
Post a Comment