

I wanted to make a present for my friend for her birthday. She loves sewing so I wanted to make her something cute and fun. Here is what I came up with: a mini sewing kit. It fits easily into a purse for on-the-go sewing.
I bought a cheap sewing kit to fill it. You can get reasonably decent sewing kits at the dollar store to fill your mini sewing kit.
This charming kit has spots for a seam ripper, scissors, a measuring tape, a pencil, safety pins, needles, thread, and a tiny removable pin cushion.
This project is great because it can be done with a fat quarter, however I made it with two different fabric prints so it's easier to show how to make it. (A fat quarter is about 18 inches by 20 inches).
Difficulty: ❥❥❥
Cost: ❥
Let's do it.
You will need:
❥ Fabric: 1/8 yard for outside and the inside pocket
1/8 yard for inside
1/8 yard for inside
❥ Thread
❥ 1/8 inch elastic: 14 inches
❥ 1/8 inch elastic: 2 inches
❥ 1/8 inch elastic: 2 inches
❥ 1/2 inch ribbon/rick rack: 10 inches
❥ 16 inches of 1/8 inch ribbon
❥ 16 inches of 1/8 inch ribbon
❥ 1 snap
❥ Felt: 1 5/8 inches by 2 3/4 inches
❥ Fleece: 4 inches by 8 inches for pin cushion
❥ Scrap of batting 4 inches by 8 inches
❥ Medium sized button for pin cushion
❥ Fleece: 4 inches by 8 inches for pin cushion
❥ Scrap of batting 4 inches by 8 inches
❥ Medium sized button for pin cushion
❥ Large button
❥ Scrap of cardboard: 3 inches by 3 inches
❥ Scrap of cardboard: 3 inches by 3 inches
❥ Sewing supplies for kit: bobbins, scissors, safety pins, seam ripper, measuring tape, buttons, pins, needles
Here is the pattern. Make sure you download it and don't scale to fit so it will be the right size when you print. Here are the two patterns:
https://drive.google.com/file/d/0BwGC9pS0wPAZbUJ2SnhTa3Z3c0k/view?usp=sharing
https://drive.google.com/file/d/0BwGC9pS0wPAZbVhpWmNzeU40SEk/view?usp=sharing
And here is the pattern for the tiny pin cushion:
https://drive.google.com/file/d/0BwGC9pS0wPAZakpnYnJydUwzUjA/view?usp=sharing
https://drive.google.com/file/d/0BwGC9pS0wPAZbVhpWmNzeU40SEk/view?usp=sharing
And here is the pattern for the tiny pin cushion:
https://drive.google.com/file/d/0BwGC9pS0wPAZakpnYnJydUwzUjA/view?usp=sharing
It's longer than a standard piece of paper so you will have to piece the pattern together by matching the dotted lines.
Cut out the pieces. You need 1 each of the lining and outside pieces, and 1 pocket.

Cut the ribbon in half and tie a knot at one end of each piece:

Cut the rick rack or 1/2 inch wide ribbon in half. I have used rick rack.

Fold the long piece of 1/8 inch elastic in half. Starting about an inch from the loop end tie 4 knots, about 1 inch apart, like this:

Fold the pocket in half along the dotted line. Press fold.

Pink the edges of the 1 5/8 x 2 3/4 inch piece of felt.

Now we assemble everything!
Pin pocket to the end of the lining piece.

Fold the 2 inch piece of elastic in half. Pin it to the point of the lining like this:

Lay the 2 pieces of ribbon/rick rack on the inside piece where marked on the pattern. Pin each end.
Lay the elastic on the inside piece where marked on the pattern. Pin each end. Lay the 2 pieces of ribbon on the inside piece where marked on the pattern with the not-knotted end on the edges. Pin each end.

Place the felt where marked on the pattern. Pinch up 1/4 inch of the felt, making a small bump in the felt. This will give you a place to poke in the needles in your kit. Pin on each side of the bump.

Stitch on each side of the bump:

Baste around the outside of the lining piece, 1/8 inch from the edge, making sure to stitch over the ends of all the ribbons, rick rack, elastic, and around the sides and bottom of the pocket.

Time to make the divisions in the pocket. Slip your tools into the pocket and pin through the pocket to the lining to make sure your tools will fit when the divisions are stitched.

Mark your stitching line. I used yellow tailor's chalk and a straight edge.

Starting at the top of each line, back stitch well, then follow your stitching line and back stitch again.

Now to put the lining and the outside together. Place the lining face up, then place the outside face down on top of it. Pin well.

Sew around the edge with a 1/4 inch seam allowance. Leave a 2-3 inch opening so you can turn it right side out.
Clip across the corners and clip the corners at the base of the flap:


Pull the kit right side out through the hole in the side. Poke the corners out so they are nice and square. Press the edges.

Hand sew the hole shut. Top stitch around the whole edge, about 1/8 inch in.
Now to make the tiny flat removable pin cushion!
Cut out the pattern and trace the flower shape onto a piece of cardboard. I used the cardboard from a cereal box.

Cut out 1 large circle and 2 small circles of batting. Cut the small circle for the back out of fleece.
Cut the sun shaped piece of of fleece:


Continue all the way around. Do not tie a knot or cut the thread:

Stack the 2 small batting circles together and place them in the middle.

Then put the large batting circle on top:

Place the cardboard flower on top:

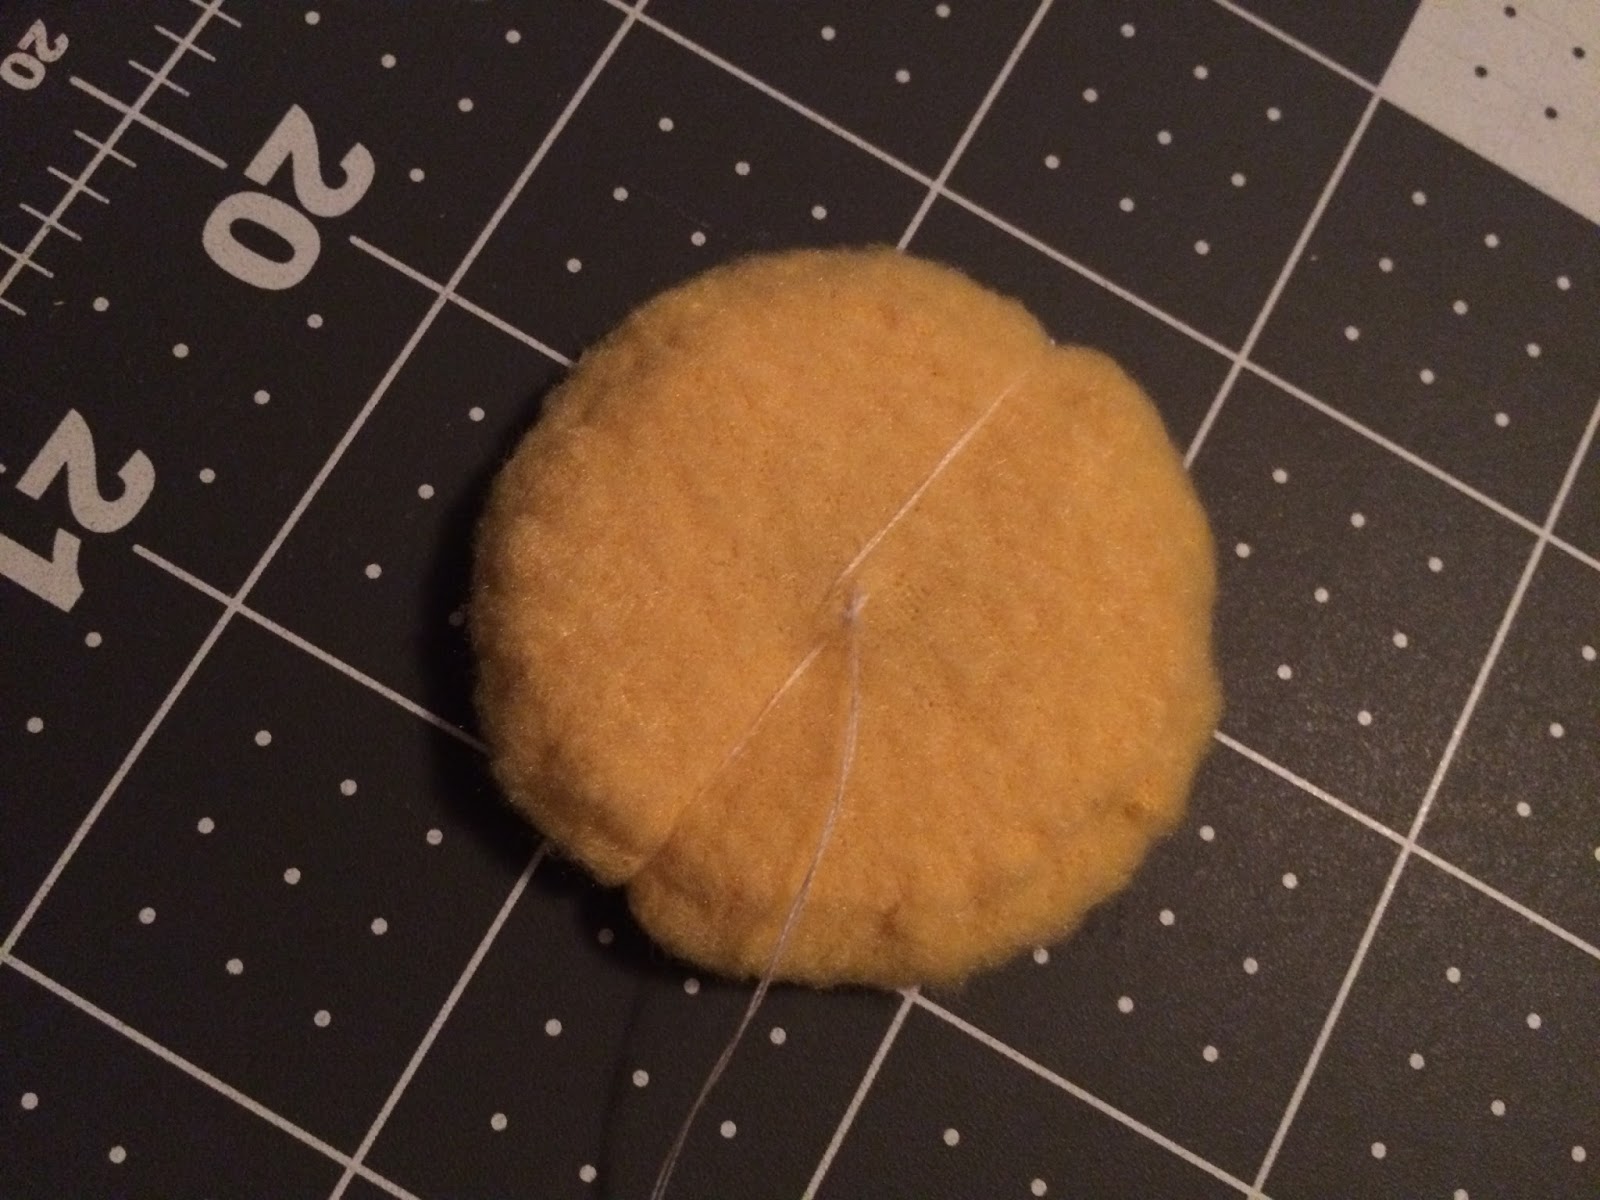
Pull the thread tight to pull the edges up around the cardboard and batting.

Stitch across the petals, securing them in place. Try to make them flat. Don't worry if it looks messy; it will be covered up. Tie a knot.

Place the small fleece circle on the bottom. Tuck the edges under and sew it down:

With a new piece of thread, tie a knot at the end. Take a small stitch in the middle of the back like this:

Pull the thread around to the front so it sits in one of the notches, then back to the back through the opposite notch and take another small stitch in the middle. Pull the thread tight.

The front now looks like this:

Repeat two more times so each notch has a thread through it and it looks like a flower:

Push the needle up through all the layers to the top of the pin cushion and sew the button on:

Go back through the pin cushion and tie a knot on the bottom.

Sew half of the snap on to cover the knots:
 Your tiny pin cushion is done!

Sew the other half of the snap on to inside of the sewing kit on the spot marked on the pattern.

Sew the large button onto the outside of the sewing kit where marked on the pattern:

Now it's time to fill the kit up!
Put needles into the felt needle holder:

Slip the bobbins into the elastic loops:


Put the safety pins on the rick rack. Thread the buttons onto the ribbon and tie a bow in the middle. Put pins into the pin cushion around the outside edge and snap it onto the kit:

Your mini sewing kit is finished!


Cut the ribbon in half and tie a knot at one end of each piece:

Cut the rick rack or 1/2 inch wide ribbon in half. I have used rick rack.

Fold the long piece of 1/8 inch elastic in half. Starting about an inch from the loop end tie 4 knots, about 1 inch apart, like this:

Fold the pocket in half along the dotted line. Press fold.

Pink the edges of the 1 5/8 x 2 3/4 inch piece of felt.

Now we assemble everything!
Pin pocket to the end of the lining piece.

Fold the 2 inch piece of elastic in half. Pin it to the point of the lining like this:

Lay the 2 pieces of ribbon/rick rack on the inside piece where marked on the pattern. Pin each end.
Lay the elastic on the inside piece where marked on the pattern. Pin each end. Lay the 2 pieces of ribbon on the inside piece where marked on the pattern with the not-knotted end on the edges. Pin each end.

Place the felt where marked on the pattern. Pinch up 1/4 inch of the felt, making a small bump in the felt. This will give you a place to poke in the needles in your kit. Pin on each side of the bump.

Stitch on each side of the bump:

Baste around the outside of the lining piece, 1/8 inch from the edge, making sure to stitch over the ends of all the ribbons, rick rack, elastic, and around the sides and bottom of the pocket.

Time to make the divisions in the pocket. Slip your tools into the pocket and pin through the pocket to the lining to make sure your tools will fit when the divisions are stitched.

Mark your stitching line. I used yellow tailor's chalk and a straight edge.

Starting at the top of each line, back stitch well, then follow your stitching line and back stitch again.

Now to put the lining and the outside together. Place the lining face up, then place the outside face down on top of it. Pin well.

Sew around the edge with a 1/4 inch seam allowance. Leave a 2-3 inch opening so you can turn it right side out.
Clip across the corners and clip the corners at the base of the flap:


Pull the kit right side out through the hole in the side. Poke the corners out so they are nice and square. Press the edges.

Hand sew the hole shut. Top stitch around the whole edge, about 1/8 inch in.
Now to make the tiny flat removable pin cushion!
Cut out the pattern and trace the flower shape onto a piece of cardboard. I used the cardboard from a cereal box.

Cut out 1 large circle and 2 small circles of batting. Cut the small circle for the back out of fleece.
Cut the sun shaped piece of of fleece:

Take a large stitch in each "petal" of the fleece circle:

Continue all the way around. Do not tie a knot or cut the thread:

Stack the 2 small batting circles together and place them in the middle.

Then put the large batting circle on top:

Place the cardboard flower on top:

Pull the thread tight to pull the edges up around the cardboard and batting.

Stitch across the petals, securing them in place. Try to make them flat. Don't worry if it looks messy; it will be covered up. Tie a knot.

Place the small fleece circle on the bottom. Tuck the edges under and sew it down:

With a new piece of thread, tie a knot at the end. Take a small stitch in the middle of the back like this:

Pull the thread around to the front so it sits in one of the notches, then back to the back through the opposite notch and take another small stitch in the middle. Pull the thread tight.
The front now looks like this:

Repeat two more times so each notch has a thread through it and it looks like a flower:

Push the needle up through all the layers to the top of the pin cushion and sew the button on:

Go back through the pin cushion and tie a knot on the bottom.

Sew half of the snap on to cover the knots:


Sew the other half of the snap on to inside of the sewing kit on the spot marked on the pattern.

Sew the large button onto the outside of the sewing kit where marked on the pattern:

Now it's time to fill the kit up!
Put needles into the felt needle holder:

Slip the bobbins into the elastic loops:

Put the seam ripper, scissors, and measuring tape in their pockets:

Put the safety pins on the rick rack. Thread the buttons onto the ribbon and tie a bow in the middle. Put pins into the pin cushion around the outside edge and snap it onto the kit:
Your mini sewing kit is finished!


